 Save
Save My daughter walked into the kitchen one Saturday morning and announced she needed three dozen treats for her school bake sale by Monday. I had marshmallows, cereal, and chocolate chips in the pantry—nothing fancy, but enough to save the day. We melted, stirred, pressed, and drizzled our way through two pans while she told me about her week. Those chocolate-covered Rice Krispy treats disappeared faster than anything else at the sale, and she came home beaming with an empty tray.
I remember making a batch for a potluck and watching a grown man take a bite, close his eyes, and say it tasted exactly like his childhood. He stood there holding the bar like it was a time capsule. That's when I realized these treats aren't just easy—they're little edible bridges to happy memories. I've made them for birthdays, movie nights, and quiet Tuesdays when I just wanted something sweet without turning on the oven.
Ingredients
- Unsalted butter: Use unsalted so you control the sweetness, and always grease your spatula and hands with a little extra to keep everything from sticking like glue.
- Mini marshmallows: The small ones melt faster and more evenly than the large ones, which means fewer clumps and a smoother base.
- Rice Krispies cereal: The classic crunch that makes these treats iconic—measure after pouring, not by shaking the box, so you get the right texture.
- Fine sea salt: Just a pinch balances all that sweetness and makes the chocolate topping taste richer and more complex.
- Semisweet or dark chocolate chips: I prefer semisweet for a mellow finish, but dark chocolate adds a grown-up edge that some people love.
- Vegetable oil or coconut oil: A teaspoon keeps the chocolate smooth and pourable instead of thick and clumpy.
- Rainbow sprinkles or chopped nuts: Sprinkles add color and joy, nuts add crunch and a little sophistication—pick whatever makes you smile.
Tired of Takeout? 🥡
Get 10 meals you can make faster than delivery arrives. Seriously.
One email. No spam. Unsubscribe anytime.
Instructions
- Prep your pan:
- Grease that pan generously with butter, hitting every corner and edge. If you skip this step, you'll be chiseling treats out with a butter knife later.
- Melt the butter:
- Keep the heat low and stir constantly—you want melted butter, not browned butter, which can taste bitter against all that sugar.
- Add the marshmallows:
- Dump them in and keep stirring until they collapse into a glossy, stretchy pool. It takes a few minutes, but don't rush it or you'll end up with lumps.
- Season the mixture:
- Stir in that optional sea salt now, off the heat, so it dissolves evenly and doesn't clump.
- Fold in the cereal:
- Work gently with a spatula, turning the cereal until every piece is coated. If you stir too hard, you'll crush the cereal and lose the crunch.
- Press into the pan:
- Use buttered hands or a buttered spatula to press the mixture down firmly and evenly. Uneven pressing means some bars will be dense and others will fall apart.
- Let it rest:
- Give it 10 minutes at room temperature to firm up before you add the chocolate. This keeps the chocolate from sinking into the cereal.
- Melt the chocolate:
- Microwave the chips and oil in 30-second bursts, stirring between each one until smooth and glossy. Overheating will make the chocolate seize and turn grainy.
- Pour and spread:
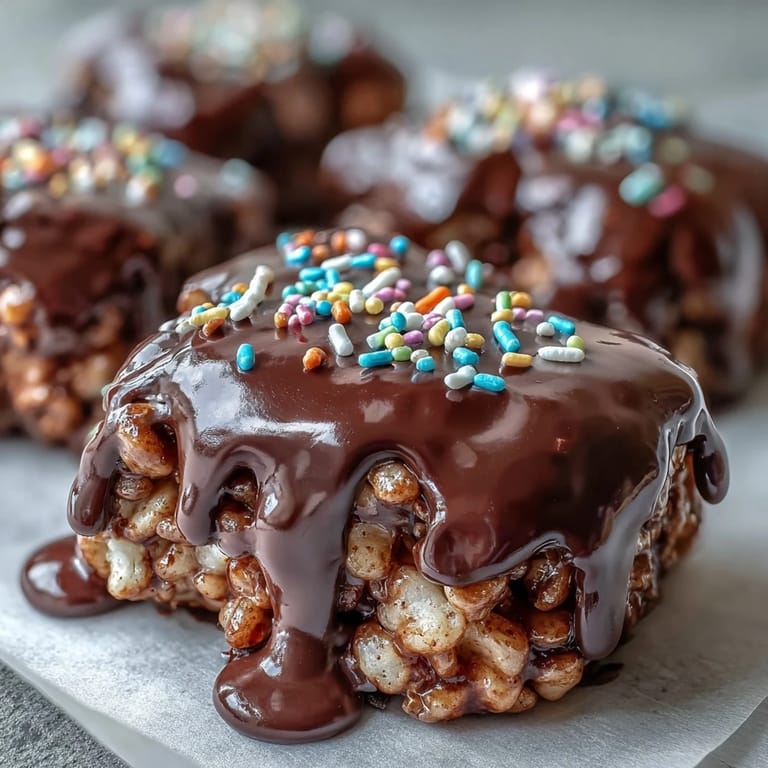
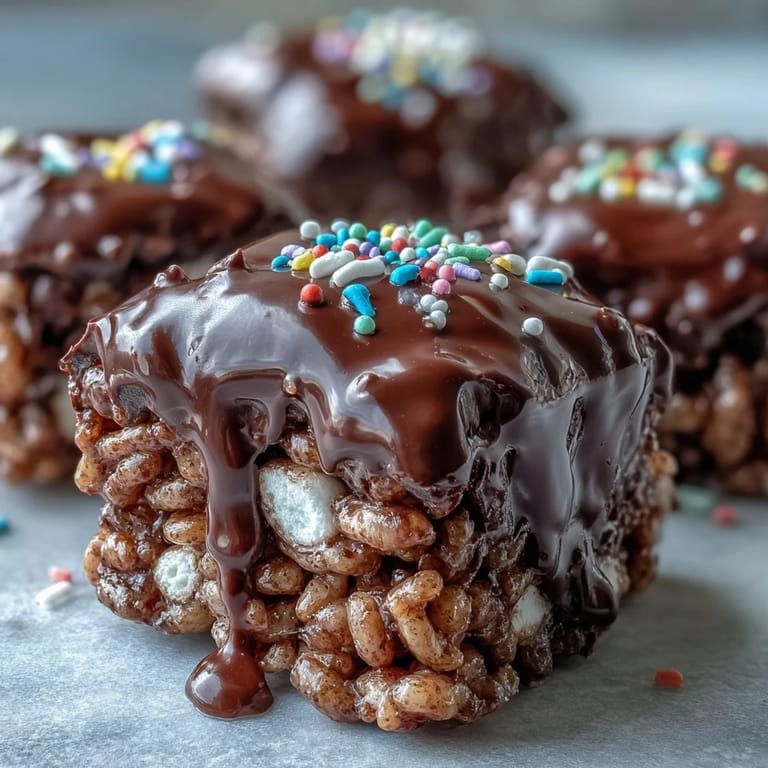
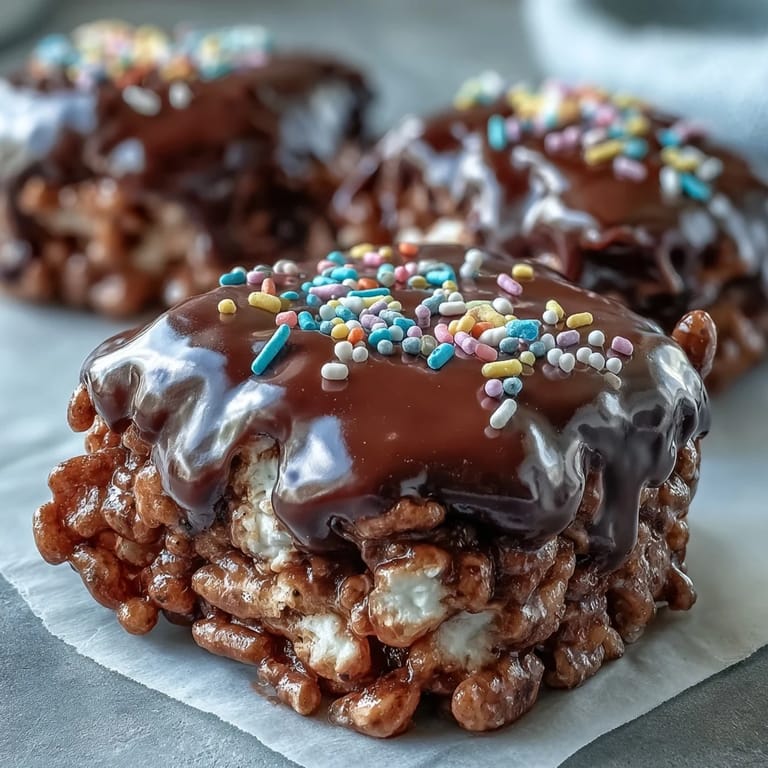
- Pour the melted chocolate over the cereal base and spread it evenly with an offset spatula. Work quickly before it starts to set.
- Add the garnish:
- Scatter sprinkles or nuts immediately while the chocolate is still wet. Once it hardens, nothing will stick.
- Set the chocolate:
- Let the whole pan sit at room temperature for an hour, or pop it in the fridge for 20 to 30 minutes if you're in a hurry. The chocolate should be firm and snap cleanly when you cut.
- Cut into bars:
- Use a sharp knife and wipe it clean between cuts for neat edges. If the chocolate cracks, let the pan warm up for a few minutes before slicing.
 Save
Save One evening I made these for a friend who was having a rough week, and I left the pan on her doorstep with a note that said, "Because chocolate fixes things butter can't." She texted me a photo an hour later—half the pan was already gone, and she was smiling in the corner of the frame. These treats have become my go-to gesture when words feel too small.
How to Store Them
Stack the bars in an airtight container with parchment paper between the layers so the chocolate doesn't smudge. They'll keep at room temperature for up to three days, or in the fridge for a week if you like them cold and snappy. I've never had a batch last longer than that—they vanish too fast.
Flavor Twists Worth Trying
Stir half a teaspoon of vanilla extract into the melted marshmallows for a warm, bakery-like flavor. Swap semisweet chocolate for white chocolate and use pastel sprinkles for Easter or baby showers. I once folded in a handful of mini chocolate chips with the cereal, and it added little pockets of extra chocolate that people went crazy for.
Serving Suggestions
These are perfect on a dessert platter next to brownies and cookies, or wrapped individually in cellophane for party favors. I like to cut them into small squares and serve them with coffee after dinner—they're rich enough that a little goes a long way. My favorite way to enjoy them is cold from the fridge with a glass of milk, late at night when the house is quiet.
- Let the chocolate cool to about 88 degrees before pouring for a professional, shiny finish.
- Use a pizza cutter for fast, straight cuts if you're making a big batch.
- Double the recipe and use a 9x13-inch pan if you're feeding a crowd or just want extras in the freezer.
 Save
Save These treats remind me that the best recipes don't have to be complicated to feel special. Make them once, and they'll become your new favorite way to say welcome, congratulations, or I'm thinking of you.
Recipe Help & Answers
- → Can I use milk chocolate instead of semisweet chocolate?
Yes, milk chocolate works beautifully and creates a sweeter, creamier coating. You can also try white chocolate or dark chocolate depending on your preference.
- → How do I prevent the treats from becoming too hard?
Avoid overcooking the marshmallows and work quickly when mixing in the cereal. Press the mixture gently but firmly into the pan—too much pressure can make them dense and hard.
- → Can I make these ahead of time?
Absolutely! These bars store well in an airtight container at room temperature for up to 3 days or refrigerated for up to a week, making them perfect for advance party prep.
- → Why add oil to the melted chocolate?
The vegetable or coconut oil helps thin the chocolate slightly, creating a smoother, more spreadable consistency and a glossier finish once set.
- → What's the best way to cut clean bars?
Use a sharp knife wiped clean between cuts, or run the knife under hot water and dry it before each cut for perfectly neat edges.
- → Can I make these gluten-free?
Yes, substitute regular Rice Krispies with certified gluten-free crispy rice cereal, and ensure all other ingredients including chocolate chips are gluten-free certified.